Some of us have been holding meetings online for over a decade. The ability to connect with colleagues around the world is truly amazing. There are so many tools built in to online meeting platforms that can make virtual interactions just as engaging as face-to-face.
Yet, there remains one aspect of online meetings that remains clunky: Screen Sharing.
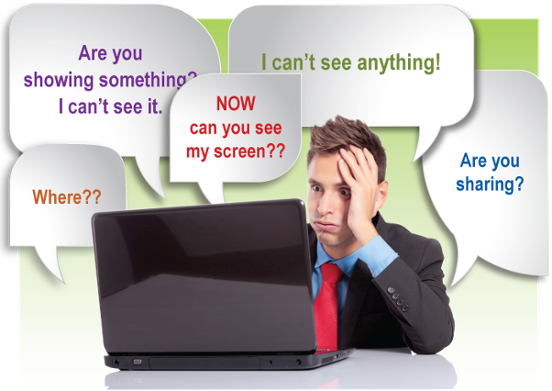
It feels like a bad joke these days. The near guarantee of someone asking, “Can you see my screen?” sends a cold shiver down my back. Yet, the ability to screen share important presentations, spreadsheets, and other files remain essential to online meetings.
Whether we want to blame the technology or the user, the fact remains the same: Screen sharing shouldn’t be hard. Users should always know what they are sharing. That’s why the engineers at Adobe built the Adobe Connect screen share the way they did – easy to use!
In this blog, we’re going to explore the features of the Adobe Connect screen share that make it easy to use and a friend to business people everywhere.
The Adobe Connect Screen Share
In my experience, too many platforms reduce screen sharing to two features:
- A button that says “Screen Share.”
- A small little window that shows you what you’re sharing.
Nothing’s wrong with either feature. Both are critical, in fact. It’s just that neither goes far enough. That button typically forces a user out of their room view and into the view of the screen share. Sometimes that transition feels chaotic, with a flurry of windows and programs flashing onto the screen.
The little screen is only as helpful as it is big. If it’s too small to be confident of what you’re sharing, it’s value is lost.
Adobe Connect makes the most out of both.
Rather than just a have a button on the right side of the room, Adobe Connect makes use of a screen sharing pod, a.k.a. the Share Pod.
The benefit of having a pod is that it can be placed anywhere in the room and users can expand or collapse it to pretty much any size.
When users enter their room, they’ll find a few preformatted Layouts that all feature a large Share Pod at the center. In the middle of the pod, there’s that good ol’ button, “Share Screen.” You click and Adobe Connect presents you options for which screen or program to share. Just like every other platform.
The Share Pod gets better from here, though. Besides the share button, is an expandable menu. Users will also find they have the opportunity to upload documents to the screen share for sharing purposes. This includes PowerPoints, PDFs, videos, and images.
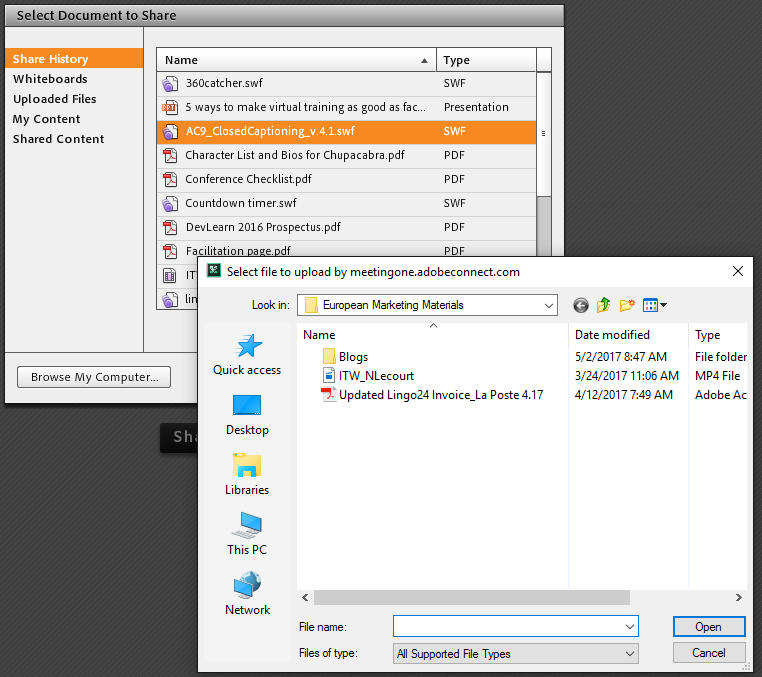
You may wonder if uploading is really all that great. The answer is YES. Uploading files save bandwidth over traditional screen sharing. So, your presentation is less likely to be glitchy.
Speaking from my own experience, things like presentations look better when they’ve been uploaded. Maybe I’ve just seen too many people fail to actually start their presentation and just scroll down between slides. But I find the experience far better in Adobe Connect.
Finally, the Share Pod has built-in whiteboarding. Any image or video, document or presentation you share, can also be drawn on or annotated. It’s easy to flip on the whiteboard mode making it relevant to any and every meeting. Once you’ve annotated your image, video, etc., you can export the image for later review.
Now, let’s look at actual screen sharing in Adobe Connect. Here, we’ll consider my earlier mentioned frustration with little windows showing the screen share.
As mentioned above, users select the “Share” button and pick out what they want to share. Adobe Connect takes the user to the item they have selected like other platforms. They go above and beyond by providing a dynamic control panel for managing your screen share.
First of all, the screen sharing control panel has a large window that shows what participants are see at any given time. You’ll always know exactly what you’re sharing because you can easily check out the window. And this panel will only be visible to the individual who is sharing their screen.
Currently Sharing Screen Shot:
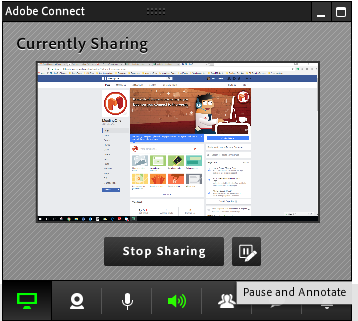
As you can see, the Adobe Connect screen share hones in on what you want to share. You won’t have random documents popping up on your screen.
On top of this, the control panel has a series of buttons that can show you all the other aspects of your room: Chats, Q&A, Notifications, and more. Let’s dig into this more.
Screen Sharing Control Panel:
While screen sharing, you can access the chat pod, microphone, webcam, volume, notifications and attendee list from the control panel!

Let’s go through some of these capabilities related to the screen sharing control panel.
Chat
So, you’re busy screen sharing when someone poses a question in the chat. How will you know?
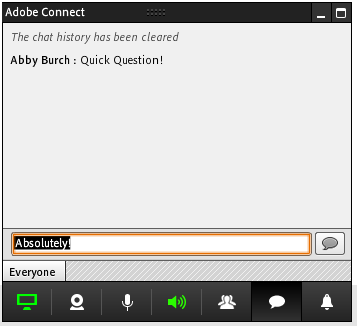
With the Adobe Connect screen sharing control panel, the Chat (statement bubble) Icon will light up. You can quickly click on that button, see what has been written, respond, then get back to the discussion and presentation.
Attendee List
The Attendee List has multiple functions in Adobe Connect. Obviously, it lists who is in attendance, and what their role is. The Attendee List can also be used to manage participant roles. For example, if I was in the middle of screen sharing and wanted someone else on webcam, I could promote that person to Presenter or Host, and they could start their camera. You can drag-and-drop participants from within the Panel!
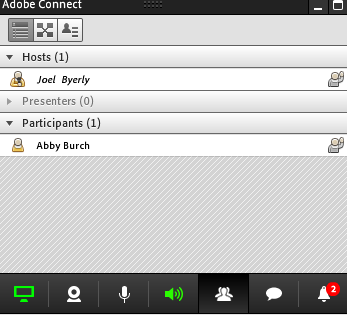
The Attendee List also serves to display participant statuses. If a participant has a question, they can update their status in Adobe Connect to “Hand Raised.” As with the Chat Pod, the Attendee List icon will light up when a participant has changed their status. You can look to the list to determine what their need is, and then act on it based on their status.As another example, let’s say you want to promote a participant to a host or a presenter. You can do that directly from the Panel by simply clicking on the Attendee List icon. (It’s the one with multiple people.)
Other Functions
From the Control Panel, you have the ability to also turn on and off your webcam, mute or unmute your microphone, turn up the volume, and look at important notifications that may be coming in.
The Notifications option is highly beneficial as it provides you a notice of late coming attendees, as well as when participants change their statuses.
Lastly, I want to point out the little square next to the box that says “Stop Sharing.” You’ll see a pause symbol and a pencil. By selecting this button, you can pause your screen share and begin annotating! Just like the whiteboard functionality discussed above, any image you pause can be annotated or drawn on. All those notes can be exported whenever you need.
All the features of the Control Panel make the Adobe Connect screen share easy to use.
Effective Screen Sharing Every Time
With Adobe Connect, I feel like I have control over my screen sharing again! I am not inviting people into my personal space, scared of what they may accidentally see! (Like my personal Facebook page or my messy virtual desktop.)
Hopefully, you’ll be saying, “As you can see on my screen…” soon enough!
Test the Adobe Connect screen share yourself! You can run a free trial with MeetingOne.

For more best practices for managing online meetings, subscribe to our blog.