You know what’s great about web conferencing platforms like Adobe Connect? They provide optimal audio integration and collaboration opportunities for your meetings, webinars, and training.
No matter where employees are based, an engaging space can be created to build relationships and accomplish the goals that keep businesses productive.
Adobe Connect is an amazing system, but its fullest optimization comes with audio integration. At MeetingOne, we have taken the necessary steps to make sure our AudioOne audio integration with Adobe Connect is seamless and simple. And leveraging AudioOne’s features, such as Click&Meet, while using Adobe Connect, will greatly improve your web conferencing experience.
Integration provides:
- Multiple audio options
- Synced audio and web recordings
- Automatic transfer of PSTN lines to breakout rooms
- Full audio controls for participant management
- Easy dial-out to your phone from your Connect Meeting
If you are new to MeetingOne, make sure you have an AudioOne account and a Connect Meeting prepared. MeetingOne makes integration so easy, the setup is as simple as 1, 2, 3.
Audio Integration in Three Simple Steps
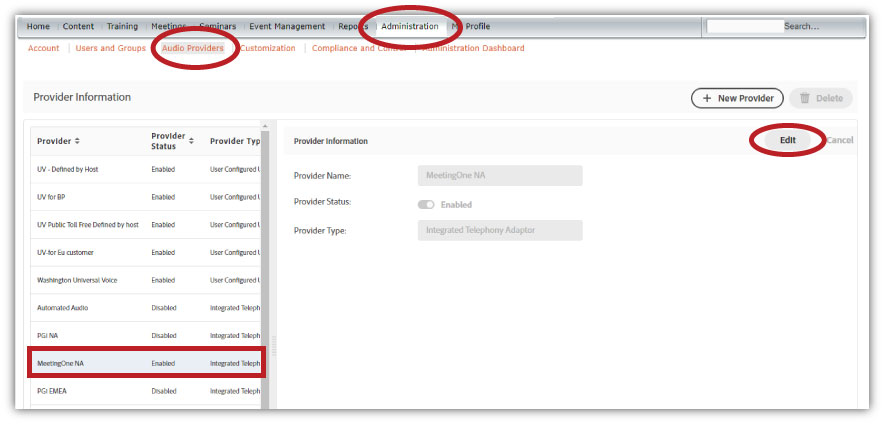
Step 1: Enabling Integration
To begin, have an Administrator with the required Adobe Connect credentials log into Connect Central to enable MeetingOne’s Audio Integration telephony adapter. After logging in, they will navigate to Administration > Audio Providers, highlight MeetingOne NA, and then click Edit.
This is the only Step you will need an Administrator for. Once the Integration is enabled, a Meeting Host will not have to repeat this step.
After clicking Edit, select Enabled, and then Save.
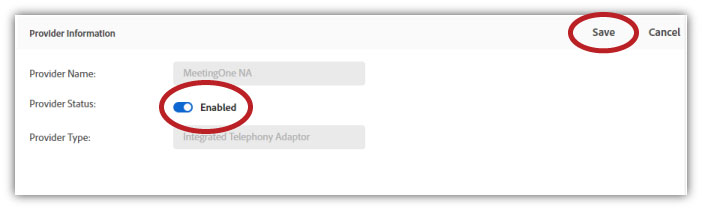
Presto! MeetingOne audio is now available on your Connect account!
If you are trialing Adobe Connect through MeetingOne, we’ve most likely already taken care of this step for you.
Step 2: Create a Profile
Anyone wanting to use AudioOne in a Connect Meeting will need to create an audio profile for themselves.
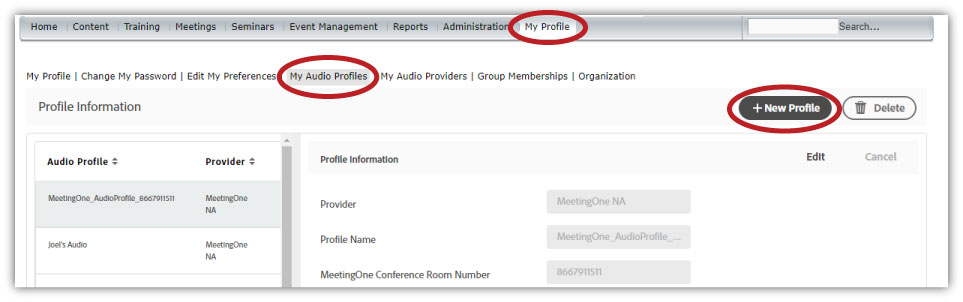
Once logged into Adobe Connect, navigate to My Profile > My Audio Profiles, and select New Profile.
Using your assigned MeetingOne room information, complete the required fields. You can name the profile whatever you’d like; the easier to remember, the better.
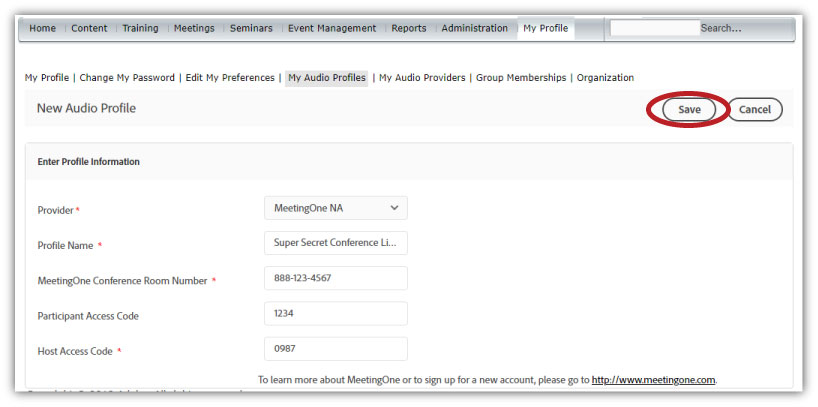
Viola! Your audio profile is created.
If you’re unable to save your profile, that means either your room number or host access code are incorrect. You can find the correct information in the welcome email you received when first getting your MeetingOne audio room.
Step 3: Associate Your Profile in Connect
Now you’ll need to include the profile just created in a new or existing Connect Meeting.
If you already have an existing Connect Meeting, locate the Meeting in your Meeting List and edit it to include your audio profile.
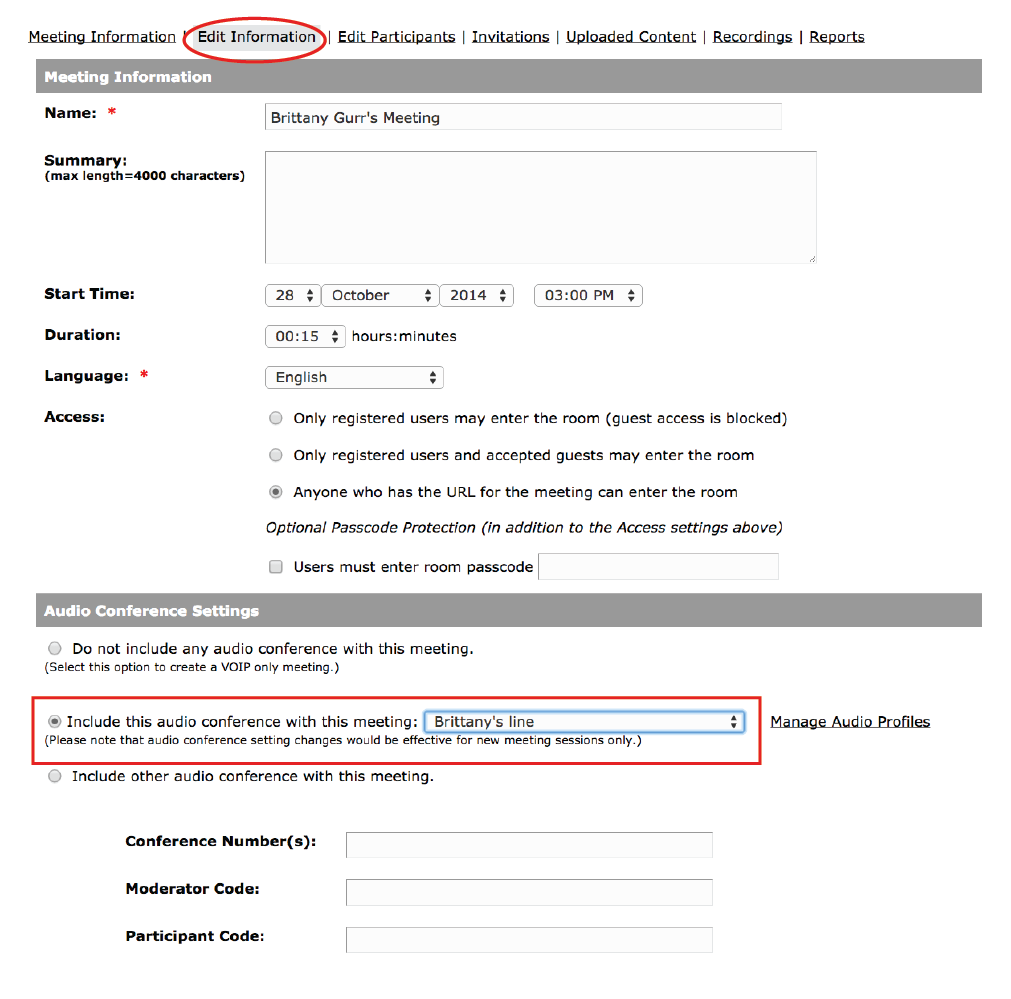
(Don’t worry about the three fields below the radial button.)
If you’re creating a new Connect Meeting, the radial will automatically be selected for you. Adobe Connect assumes that if you’ve created an audio profile, you’ll want to use it! If you happen to have two or more audio profiles, be sure to select the correct one.
And that’s it – easy as 1, 2, 3!
Now that your audio integration has been handled, turn your attention to the meetings and trainings that will define your business’ success. In the end, that’s what it’s all about – making most of your tools so you thrive. If you are ready to get the most out of Adobe Connect, integrate your audio with AudioOne.