Liven Up On-Demand Training with Adobe Connect Interactive Recordings!
With Adobe Connect, you don’t have the run of the mill recording, which is the standard video capture of the meeting screen. Which is how most web conferencing platforms record. Adobe Connect went outside the box and allows users more functionality than ever before; it’s interactive and completely indexed!
When you start the typical web conference recording, all you can do is watch the video play on your screen, but with an Adobe Connect recording the meeting itself starts playing. Sounds confusing, but I have created a couple of exercises to show you firsthand how cool this technology is!
Before we get started…
Click on this link to go to one of our recent webinars to start these exercises.
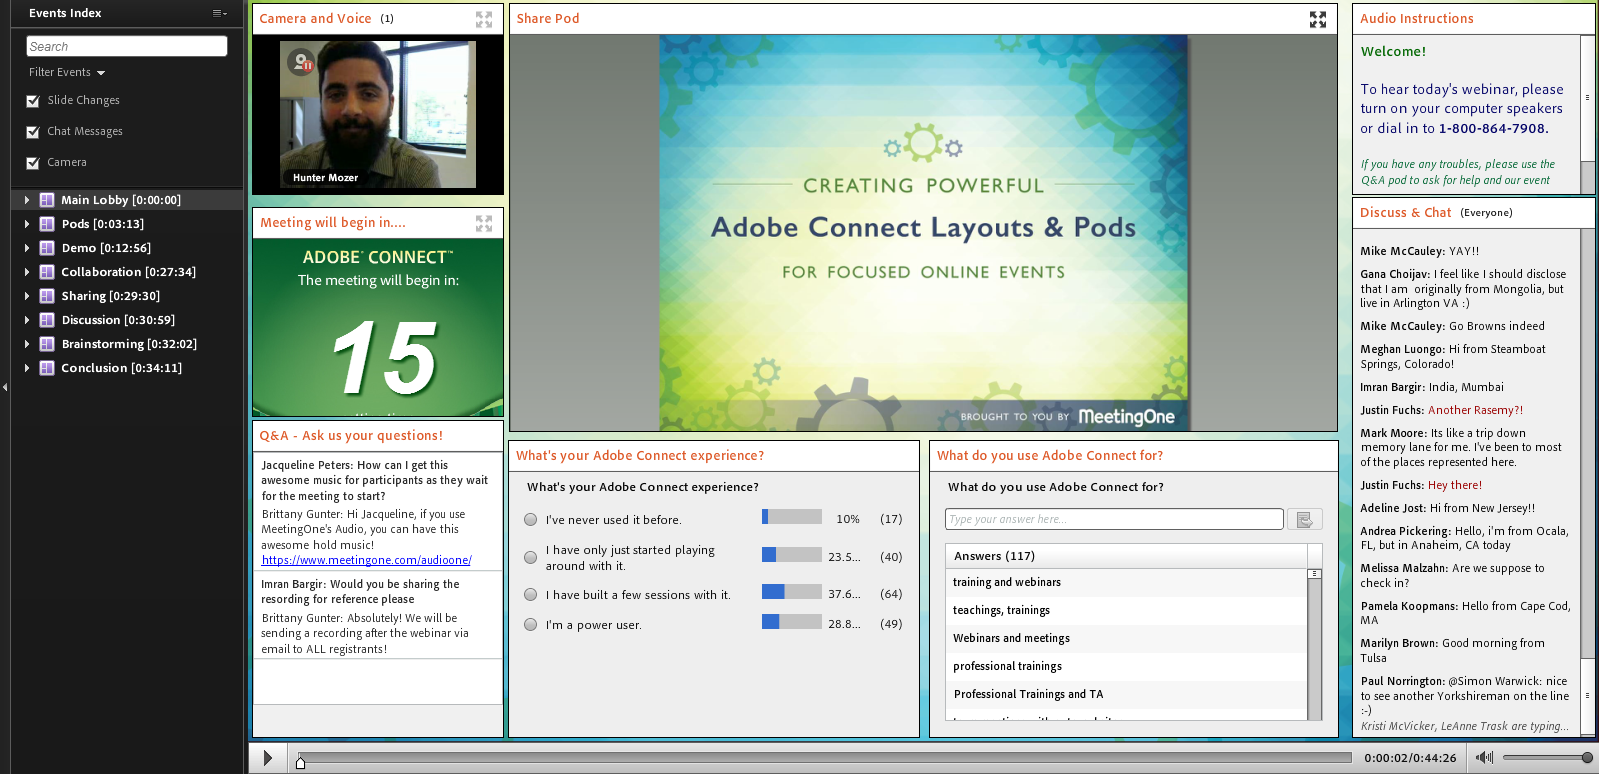
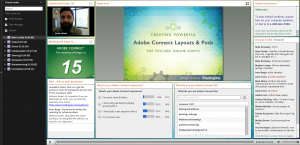
Before we Start > Pause the Recording. This is what your recording should look like:
First Exercise: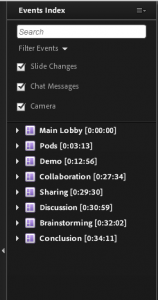
In the Events Index on the left-hand side of the screen you can filter events. You can filter those items out if you do not want to view these items in the different layouts (i.e. Main Lobby, Pods, Demo, Collaboration, Sharing, Discussion, Brainstorming, Conclusion), shown below the Filter Events section.
- Slide Changes (When the PowerPoint changes slides)
- Chat Messages
- Camera
With this recording, I want you to first expand the Main Lobby, you do that by clicking on the arrow >. Notice you suddenly see all of the chat messages populate under that tab. Click on a couple of these different chat messages, and notice that the ‘Discuss & Chat’ pod updates each time you do this!
Now I want you to uncheck the ‘Chat Messages’ filter in the Event Index. You will notice all those messages went away.
Second Exercise:
Without playing the recording still, I want you to take a look at these three pods:
- Camera and Voice
- Meeting will begin in…
- Share Pod
They all have something in common, you can expand the pods, and make the size bigger!
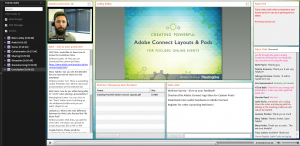
Take a look at the Camera and Voice pod below (everyone meet Hunter, he is an amazing speaker!) – click on the 4 arrows, I have circled.
Ta-DA! Full-Screen! Now try that with all 3 pods.

Third Exercise:
Staying in this same screen, we are going to concentrate on the following pods:
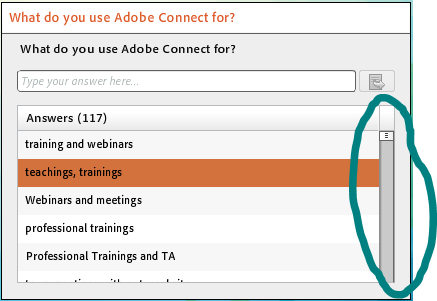
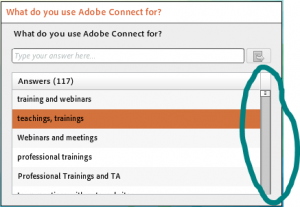
- What do you use Adobe Connect for?
- Audio Instructions
- Discuss and Chat
These all have something in common, you can scroll in the pod and view more content!
Take a look at the ‘What do you use Adobe Connect for?’ Pod. Hold and Click on the small white square, and scroll up and down – see all the answers people typed in during the live session!
Fourth Exercise:
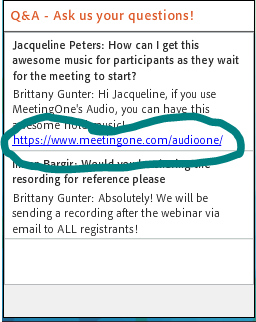
Again, please don’t play the recording – one more thing to look at in this screen. We are going to concentrate just on the ‘Q&A – Ask us your questions!’ Pod. See the circled link in the image below? Click on that in the recording! Voila! Takes you to the web page. Any hyperlinks in Adobe Connect recording’s, can be clicked on!

Fifth Exercise:
Now I want you to jump to the ‘Conclusion’ layout of the recording. You can do that by simply clicking on Conclusion in the Events Index bar we discussed in the first exercise. Play the recording briefly, and then pause again once the pods populate with content. (Note, you don’t have to pause a recording to do these things, I just want you to be able to concentrate on the task at hand!)
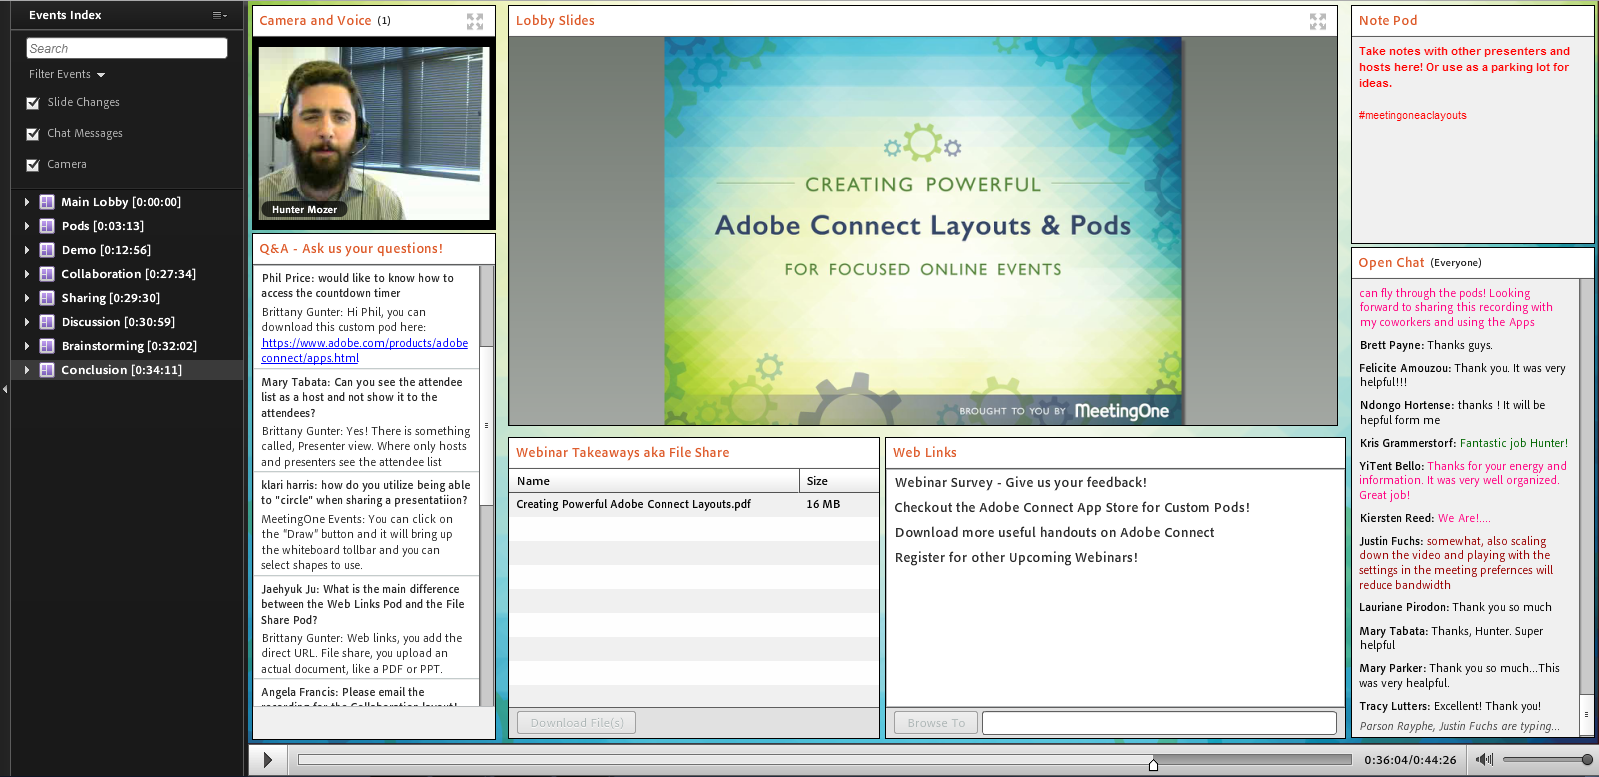
Your recording screen should look like this:
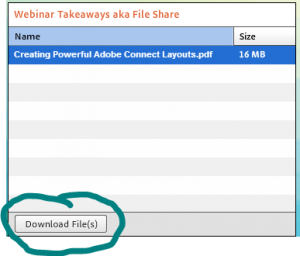
The pod we are going to concentrate on is the ‘Webinar Takeaways aka File Share’ Pod. In the recording, I want you to click on ‘Creating Powerful Adobe Connect Layouts’ in this pod. Once the name is highlighted, select Download File(s). Immediately you will be able to download this file… straight from the recording! Powerful stuff, right?
Sixth Exercise:
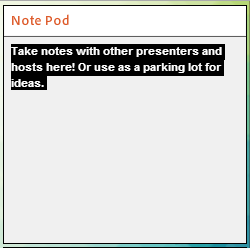
In this same layout, we are going to focus on the ‘Note Pod’ Pod. Almost any text you see in the recording, you can actually select the text and copy! This is great for quickly copying notes, and saving ideas or bullet points.
Seventh and Last Exercise:
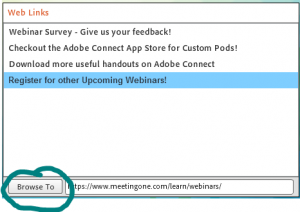
In this same paused screen, we are going to work with the ‘Web Links’ Pod. Click on any of the links in this pod, as you can see below I selected ‘Register for other Upcoming Webinars!’. Once you select a web link, click on Browse To, as circled below. If the web page opened up, great job!
Just to note, there are some things you cannot do with these recordings, such as:
- Answer poll pods questions; multiple choice or open answer. The questions are closed once the meeting is complete – you can only review the response from the live meeting in a recording. (You can still take a quiz if meeting used a quiz created in either Presenter or Captivate).
- Cannot type into any of the chat pods
Another great thing about Adobe Connect recordings is that Meeting Hosts can even edit the recordings! A few things you can do:
- Edit timeline
- Hide pods – chat pod, attendee and Q&A
- Remove names of attendees in attendee pod to keep anonymity
If you want to learn more about editing your recordings, check out this video blog from Adobe!
Want to learn more about Adobe Connect? Schedule a customized demo today with a product specialist!
If you already have Adobe Connect, have you tried integrated audio with your Connect room? Learn why it’s a MUST to always integrate your audio!